Thursday, December 24, 2009

Using Ramon at Unificacion Maya


I have just finished the Unificacion Maya Ceremonies for another year.  It is pretty all-absorbing for the month of December, and I haven't been able to take even a moment for blogging.  However, it is over now, and I am determined to get back on my usual schedule.

This Pineapple-Ramon Upside Down Cake was the dessert for our second ceremony.


This cake was invented and baked by Doña Juana, the president of the Ix-canaan Women's Group.


We also had a Ramon Information Day.  After the ceremony at the Ixlu Archeological Site on Day 4, we went to the production facility for Nutri-Naturales, where they had prepared a snack of several items made from the ramon flour that they are producing.


They served a hot and a cold ramon beverage with ramon cookies, ramon sweet breads and these excellent ramon rolls (bollitos).


Read More...

Tuesday, November 10, 2009

BB: Chicken Chili


This will be recipe #2 in the Barefoot Bloggers Challenge. It was well after dark before I finished it and served it, so the photography is pretty bad. I was expecting a Chicken Chili to have beans in it, but no, this was something totally different and unexpected.

Chicken Chili
(2001, Barefoot Contessa Parties!, All Rights Reserved)

Preface:
  • I halved the recipe.
  • I added an extra clove of garlic ... mosts recipes are written to be "safe" in the garlic range, so can be upped without overdoing it.
  • I can't buy canned tomatoes here (all for the best, I think) so I peeled a pound of tomatoes, put half of them through the blender and mashed the other half with my potato masher.
  • For serving, I topped the chili with yogurt and mozzarella cheese
Ingredients:


  •  4 cups chopped yellow onions (3 onions)
  • 1/8 cup good olive oil, plus extra for chicken
  • 1/8 cup minced garlic (2 cloves)
  • 2 red bell peppers, cored, seeded and large-diced
  • 1 teaspoon chili powder
  • 1 teaspoon dried red pepper flakes, or to taste
  • 1/4 teaspoon cayenne pepper (or to taste)
  • 2 teaspoons kosher salt, plus more for chicken
  • 2 (28-ounce) cans whole peeled plum tomatoes in puree, undrained
  • 1/4 cup minced fresh basil leaves
  • 4 split chicken breasts, bone in, skin on
  • Freshly ground black pepper
For Serving:

  • Chopped onions, corn chips, grated cheddar, sour cream
Instructions:

Cook the onions in the oil over medium heat for 10 to 15 minutes, until translucent.


Add the garlic and cook for 1 more minute. Add the bell peppers, chili powder, cumin, red pepper flakes, cayenne, and salt. Cook for 1 minute.


 Crush the tomatoes by hand or in batches in a food processor, fitted with a steel blade (pulse 6 to 8 times).


 Add to the pot with the basil.


 Bring to a boil, then reduce the heat and simmer, uncovered for 30 minutes, stirring occasionally.

Preheat the oven to 350 degrees F.

Rub the chicken breasts with olive oil and place them on a baking sheet. Sprinkle generously with salt and pepper. Roast the chicken for 35 to 40 minutes, until just cooked.


 Let cool slightly. Separate the meat from the bones and skin and cut it into 3/4 inch chunks.


 Add to the chili and simmer, uncovered, for another 20 minutes.


 Serve with the toppings, or refrigerate and reheat gently before serving.


Verdict:

I have already put this recipe on my rotating menu.  I hollowed out a mound of rice and poured a large scoop of chili down into the middle ... and it was FANTASTIC!!  I topped the chili with some grated cheese and a big dollop of yogurt (my standard sour cream substitution).  It was even better the second day.

Read More...

Saturday, November 7, 2009

BB: French String Beans


I read last week about the Barefoot Bloggers Challenge ... to cook from 1 to 5 Iva Garten recipes (all listed at the "challenge" link) and post them this week.  I checked over the recipes that had been chosen for the challenge, and they all sounded fantastic.  'Why not?' I thought, 'we have to eat'.  As usual, cooking and eating the recipes is not the difficult part ... blogging them has turned out to be the challenge!!  I have had some major uploading problems recently, but with some late night work (when our satelite dish seems to get a stronger signal), I am beginning to catch up

I seldom buy green beans here ... the usual variety that are available in the market have VERY strong threads in them, and are difficult to prepare.  And no matter what you do, you end up with little strings stuck between your teeth.  Anyway, I must have been meant to make these because they featured stringless green beans in the vegetable section of the Maxi-Bodega this week, really fresh nice ones, so I bought a pound with this recipe in mind.

French String Beans

Preface:
  • I have no idea if the beans were French, but for sure they were not "string" beans ... 
  • I didn't have yellow bell peppers (although I will soon ... I have a couple of plants of yellow bell peppers grown from some seeds that I took from a yellow pepper when I was visiting Mom in Canada, and there are a couple of ripening peppers already), so used only red.
Ingredients:


  • 1 pound French string beans
  • Kosher salt
  • 1 red onion, large, diced
  • 1/2 red bell pepper, large diced
  • 1/2 yellow bell pepper, large diced
  • Good olive oil
  • Freshly grated black pepper

Instructions:

Preheat the oven to 425 degrees F.

Blanch the string beans in a large pot of boiling salted water for just 4 minutes.


Drain immediately and immerse in a large bowl of ice water to stop the cooking. When they are cool, drain and set aside.

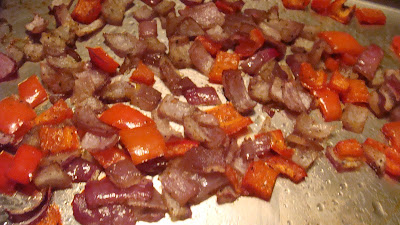
Meanwhile, in a large bowl, toss the onion and bell peppers together with 2 tablespoons of olive oil and sprinkle generously with salt and pepper. Place in a single layer on a baking sheet and roast for about 15 minutes, tossing with a spatula from time to time to be sure the vegetables roast evenly.


 Just before serving, reheat the string beans in a large saute pan drizzled with a little olive oil. Sprinkle with salt and pepper and arrange on a platter. Spoon the roasted vegetables over the string beans and serve hot or at room temperature.

Verdict:


 Excellent! Simple and fast to make.  Delicious!! The oven roasted vegies added an incredible burst of flavour to the crunchy green beans. This recipe has gone into the file to teach to the cook at Gringo Perdido.

Read More...

Friday, November 6, 2009

CEiMB: Linguini with Shrimp


This week's Craving Ellie in My Belly recipe was chosen by Farah of Confessions of a Novice Baker.

I love shrimp.  I have been looking forward to splurging on a package of shrimp to make this dish.  And it didn't disappoint!

Linguini with Shrimp

Preface:


  • instead of linguini, I used a Tri-Color Vegetable Pasta
  • I upped the garlic to 3 cloves ... I love garlic
  • I used only 3/4 of a pound of shrimp, which I bought peeled, deveined and frozen.  I would have bought them with shells, if I could have found them, because I think that, even frozen, they retain more flavor if they are with shells.
  • the white wine that I used was actually the last part of a bottle of cooking wine ... I can imagine that the dish would have been even better with a decent quality wine.
  • asparagus is unheard of in Peten, however, I had just made a very tasty green bean recipe the day before, and had half of the beans left over, so decided to use them instead.
  • I had no parsley, and don't actually like parsley all that much, so I used a mixture of half fresh chopped cilantro, and half fresh chopped basil.
  • I had no cherry tomatoes, so I chopped up a couple of Roma tomatoes.
Ingredients:


  • 3/4 pound linguini
  • 2 tablespoons olive oil
  • 2 garlic cloves, minced
  • 1 pound large shrimp, peeled and deveined
  • 1/3 cup freshly squeezed lemon juice
  • 1/2 cup white wine
  • 1 bunch asparagus stalks, trimmed
  • Salt and freshly ground black pepper
  • 1 cup freshly chopped flat-leaf parsley
  • 1 container cherry tomatoes, halved
Instructions:

Bring a large pot of water to a boil.  Add the linguini and cook according to the directions on the box.  Drain, reserving 1 cup of the cooking water.

Meanwhile, heat the olive oil in a large skillet over a medium-high flame.  Add the garlic and saute for 1 minute

Add the shrimp and cook for 3 to 4 minutes, until the shrimp turn pink.  Remove the shrimp from the pan and set aside.


Add the lemon juice, white wine and the reserved cup of water to the skillet.  Let simmer until the liquid is reduced by about half.


Salt and saute the asparagus.  cut into 1-inch pieces.


Return the shrimp to the pan


and stir in the parsley.


Add the drained linguini to the shrimp mixture, tossing to combine.


Add asparagus and tomatoes.  Season with salt and pepper to taste.


Verdict:


Delicious!  I never would have chosen to make a pasta with that combination of flavors.   However, I have learned that there are a lot of unlikely flavor combinations that are incredibly delicious.  This combination of garlic, lemon and wine are a perfect background for the shrimp.  The slightly crunchy (stringless) green beans were a perfect foil for the pasta, and also combined well with the lemony flavor.  I made one error in that I must have overcooked the shrimp a bit ... it turned out more chewy than I would have liked (or maybe it had been sitting frozen at Maxi-Bodega for way to long, its hard to say with shrimp here).  I made an interesting discovery when I didn't reheat the noodles before adding the sauce, and they were so cool that everything cooled right off.  E. said that he thought that it was a pasta salad (which would be okay, except that he doesn't really like salads).  I found out later, when we had it served hot, that that was not only because it was cold, but because the dressing reminded him of salad dressing.  And when I thought about it, I realized that yes, it is a dish that could quite easily be served cold with excellent results.

If I am lucky enough to have some fresh shrimp, I would definitely plan to make this recipe again.

Read More...

Saturday, October 31, 2009

CEiMB: Pumpkin Muffins


Now that I have a large refrigerated container of roasted squash, it is time to begin to create.  And what better place to start than with these mouth-watering Pumpkin Muffins ... another Craving Ellie in My Belly recipe by Ellie Krieger.  This week's recipe was chosen by Oddball OvenMitt ... and a timely choice it is as pumpkin fits perfectly with the autumn season.


Pumpkin Muffins

2006, Ellie Krieger
Makes 12 Muffins


Preface:
  • I cooked a giant squash instead of using canned pumpkin .. it seems that pumpkin is not popular here ... canned pumpkin does not exist in Peten.  I did find some small fresh pumpkins at the Maxi-Bodega (Walmart) but they were too expensive.  In the end, I bought the giant squash at the market, thinking that the price would be better, and later that day, found the same size of sqash at the Maxi-Bodega for half the price.  Live and Learn.
  • There is only one type of flour here .. white flour.  However, a few years ago, when I wanted to start making and selling bran muffins to local hotels, I managed to convince a local store to carry bran ... so when I want a whole wheat flour, I mix the bran back into the white flour, using the concentration I need to create the finished product that I want.  For this recipe, I used 1 3/4 cups of white flour, and 1/4 cup of bran.
  • The brown sugar that I use is "panela".  Panela is the direct result of boiling down sugar cane juice until it goes past the molasses stage and actually hardens.  In effect, it is molasses that has been taken one step further in the refining process.
  • I'm pretty sure that the molasses that I used was not unsulphered.  Molasses is another ingredient that is not sold in stores here.  About 5 years ago, I looked everywhere for molasses to use to make some of Mom's famous molasses cookies, and eventually I found a rich farmer who had brought in a tanker truck FULL of molasses to sell to other farmers in the area ... I discovered that this is one of the ways of providing extra fattening nourishment for cattle, and is not eaten by humans!  I explained to him that I was looking for molasses for cooking (he had never heard of such a thing) and asked if I could buy some.  He was selling by the barrel, and didn't have any containers for smaller sales, but he poured the last of the Coke out of his 2-liter bottle, washed it out and filled it up from a spigot in the side of the huge tanker truck.  He refused to take any money for it insisting that it was so little, that it didn't matter.  So, I have had this 2-litre bottle of PURE MOLASSES lying in the bottom drawer of my refrigerator for a long long time (like years).  I could never bring myself to use it, not only because I wouldn't not be able to replace it but I also thought that it would be too strong for my recipes.  Thanks to this recipe, I have finally opened the bottle and begun using it.
  • Several comments mentioned that the spicing was nt strong enough so I used a liberal hand when measuring ... not doubling the amounts, but rounding up the measuring spoons.
  • I used my own home made yogurt instead of buttermilk
Ingredients:


  • Cooking Spray
  • 1 cup all-purpose flour
  • 1 cup whole-grain pastry flour
  • 1 teaspoon baking soda
  • 1/2 teaspoon salt
  • 1 teaspoon ground cinnamon
  • 1/2 teaspoon ground ginger
  • 1/4 teaspoon ground cloves
  • 1/8 teaspoon ground nutmeg
  • 3/4 cup packed dark brown sugar
  • 3 tablespoons unsulphered molasses
  • 1/4 cup canola oil
  • 2 large eggs
  • 1 cup canned pumpkin
  • 1 teaspoon vanilla extract
  • 3/4 cup lowfat buttermilk
  • 1/4 cup raw unsalted pumpkin seeds
Directions:

Preheat oven to 400 degrees F.  Coat a 12-cup muffin pan with cooking spray.
In a medium bowl, whisk together the all-purpose and whole-wheat flours, baking soda, salt, cinnamon, ginger, cloves and nutmeg.


In a large bowl, whisk the sugar, molasses, oil and 1 egg until combined.


Add the other egg and whisk well.


Whisk in the pumpkin and vanilla.


Whisk in the flour mixture in two batches,


alternating with the buttermilk.


Whisk until just combined.
Pour the batter into the prepared muffin pan and sprinkle with the pumpkin seeds.


Tap the pan on the counter a few times to remove any air bubbles.  Bake for 20 minutes or until a wooden pick inserted in center of 1 of the muffins comes out clean.


Let cool on a wire rack for 15 minutes.  Run a knife around the muffins to loosen them and unmold.  Cool completely on the rack.

Verdict:


Delicious!  The molasses really boosted the flavor of the spices and added to the distinctive "pumpkin pie" flavor.  The crunch of the pumpkin seeds made for a perfect topping.  I must have used smaller muffin cups that was called for, because I ended up with 18 muffins.  I'm glad I did or I might not have had enough to photograph!


Read More...

Friday, October 30, 2009

Cooking with Pumpkin & Squash


I never cook with pumpkins or squashes.  I think this has something to do with the impenetrable nature of this vegetable.  I have never been able to figure out how to get into it.  What type of tool would one use to smash through to the meat inside?  Would an axe work?

After reading through the equivalent of a large book of pumpkin recipes in the last week, I decided I wanted to try a few of them, and since canned pumpkin is unheard of here, it was now necessary to figure out how to crack through this rock-like shell to the golden meat within.

I began by calling in help. I have watched the local men use their razor-sharp machetes for a huge variety of jobs ... from mowing the lawn to cutting down trees ... surely this method would work for a basic squash. Don Pablo was happy to show me how to do this job. I expected him to draw back his "cutlass" and smash it with unerring accuracy into the top of the squash, separating it immediately into two equal parts. However, I was completely wrong. I don't know why I didn't think of it myself. He DID use his machete ...


but WITH a hammer!!  He placed the machete in the middle of the squash and with a few light taps of the hammer ... voila!  Now why didn't I think of that?


The machete cut down through that squash as if it were butter ...


leaving me with two more or less equal parts and bringing me to the next stage of squash prep ... removing the green slimy stringy mass of seeds.


I scraped and cleaned the seeds out of the middle, gave half of them to Don Pablo for planting in his garden, and saved the other half to plant in my own garden.  I couldn't get any more of the green slimy strings out, but I figured that they might be easier to remove once the squash was cooked.

I didn't get any photos of the last stage, but I rubbed olive oil all over the inside, and baked both halves, open side up, at about 350' for about 2 hours.  The green strings cooked into the yellow squash, so it was impossible to separate them once cooked ... however ... I discovered that it didn't matter.  I used 1 cup of the squash for my first pumpkin recipe, and it was excellent.

I ended up with about 5 cups of squash ... stay tuned as we cook it up in a variety of sweet and savory dishes!

Read More...

Friday, October 9, 2009

BB: Cheddar Corn Chowder


There is no way a photo can do justice to the superb flavor of this Cheddar Corn Chowder. This weeks Barefoot Blogger recipe was suggested by Jill of My Next Life. Being from Southern New Brunswick, I've eaten a lot of corn chowder, but this one has them all beat hands down.


Cheddar Corn Chowder

The Barefoot Contessa Cookbook
10 to 12 servings


I cut way back on this recipe.  There are only two of us, and it uses a lot of dairy so I didn't want to freeze it, so I made about 1/3 of this quantity.  It turned out to be 4 good servings.


The bacon that I used was really good, but really fatty, so I didn't add much olive oil, and I poured about half of it off before I made the chowder.  Then I didn't add extra butter to the pan either.


Instead of half and half cream, I used half home made yogurt, and half whole-milk powder with water.


The closest I could get to a "sharp white cheddar cheese" is this "Taco Mix", that is not sharp, not white and just barely cheddar cheese.


I made my own chicken stock from backs/necks/wings of chicken that I keep frozen for just this purpose.


Ingredients:


  • 8 ounces bacon, chopped
  • 1/4 cup good olive oil
  • 6 cups chopped yellow onions (4 large onions)
  • 4 tablespoons (1/2 stick) unsalted butter
  • 1/2 cup flour
  • 2 teaspoons kosher salt
  • 1 teaspoon freshly ground black pepper
  • 1/2 teaspoon ground turmeric
  • 12 cups chicken stock
  • 6 cups medium-diced white boiling potatoes, unpeeled (2 pounds)
  • 10 cups corn kernels, fresh (10 ears) or frozen (3 pounds)
  • 2 cups half-and-half
  • 8 ounces sharp white cheddar cheese, grated

    Instructions:


    In a large stockpot over medium-high heat, cook the bacon and olive oil until the bacon is crisp, about 5 minutes.

    Remove the bacon with a slotted spoon and reserve. Reduce the heat to medium,

    add the onions and butter to the fat, and cook for 10 minutes, until the onions are translucent.


    Stir in the flour, salt, pepper, and turmeric and cook for 3 minutes.


    Add potatoes,


    And chicken stock


    bring to a boil, and simmer uncovered for 15 minutes, until the potatoes are tender.
    If using fresh corn, cut the kernels off the cob and blanch them for 3 minutes in boiling salted water. Drain. (If using frozen corn you can skip this step.)
    Add the corn to the soup,


    then add the half-and-half


    And the cheddar


    Cook for 5 more minutes, until the cheese is melted.
    Season, to taste, with salt and pepper.
    Serve hot with a garnish of bacon


    Verdict:

    This chowder was rich and creamy and full of flavor.  The smoky, salty base of bacon made a perfect background to the sweet corn.   I'm glad I used the yogurt instead of cream as it gave it a tangier cheese-like flavor that helped make up for the fact that I didn't have any sharp cheddar.  I would like to have had a few cobs of New Brunswick peaches and cream corn, but even the canned variety tasted great in this recipe ... next time I would use more.  This recipe is definitely my new main recipe for corn chowder.


    Read More...

    Newer Posts Older Posts Home